Are always more numerous women who decide to take care of their own Hands and Nails to have a smart and impeccable long-lasting appearance through a Gel Nails Extension, a perfect solution not only to allow our nails to grow more healthy and strong, but also to have the look that You always wanted!
Nails Extension is suitable for anyone, but it is important to choose the making type that is more appropriate for your nails and your needs; Nails Extension and Lengthening Methods at your disposal are of two types, as we will see in this analysis, but the secret for a perfect Nails Extension lies in the correct realisation of all Work Steps!
This is why we decided to create this new analysis and propose You a synthesis of the correct Working Phases of the Gel Nails Extension, both with Tips that with Nail Forms (Sculpture Method)!
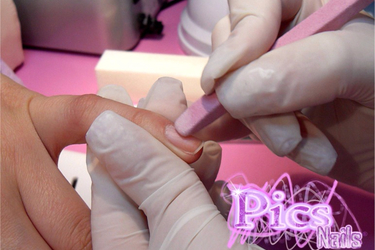
We start our overview of the Steps of a correct Professional Gel Nails Extension with the very early phase, the Preparation one, which is common to both Extension methodologies, that is both in the case You opt for the use of Tips that with Nail Forms!
We eliminate any trace of Nail Polish that is present on the nail surface with the Acetone Free Nail Polish Remover and then proceed by roughening and by matting the Natural Nail with our Stone Nail File for Preparation!
CLICK HERE AND BUY THE STONE NAIL FILE FOR PREPARATION!
We Mate the nail by acting carefully, with soft circular movements over the whole surface, and We gently move the cuticles toward the nail’s root.
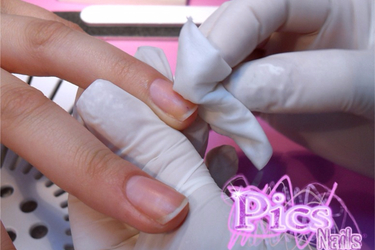
With our Stone Nail File for Preparation we will be able to make porous the nail surface, perfectly dried and matte and, therefore, suitable to "catch" efficaciously the product that We will coat after!
Once that this first Step is finished, we proceed further degreasing the nail surface with the help of a small square of Cotton Pads soaked in Nail Cleaner, the specific liquid to dry and perfectly clean the natural nail!
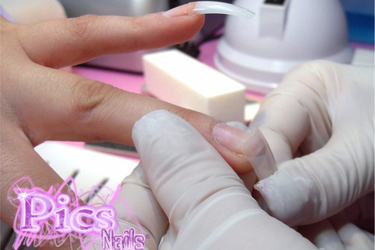
In the case you have decided to proceed with a Nails Extension with Tips, once arrived at this point of our work, we choose the Tips on the basis of the sizes of the natural nails and with the use of a thin layer of Tip Glue - directly on the back of the Tip – We proceed by applying it on the nail by making adhere the Smile Line to our nail surface!
It is only when we arrive at this moment that we will be able to finally decide the length that we desire and proceed by shortening the Tip with the Tip Cutter and filling the Tip with a Straight Nail File with thick grit, in order to define and soften the form that we want to give to our Nails!
At this point, we will just have to eliminate the unaesthetic "step" which is formed between the point of application of the tip and the natural nail using a Curved Nail File Zebra 100/100, to obtain a nail with the incredibly natural aspect!
Once concluded the filling, we degrease once again with our Nail Cleaner and we apply a thin layer of Nail Primer.
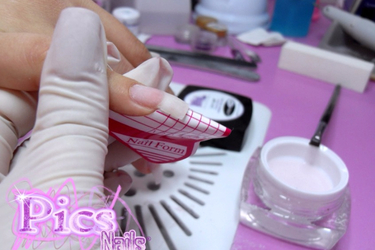
In the case in which, instead, you have choose to proceed your Gel Nails Extension with the use of Millimetred Nail Forms, we will proceed differently: we apply our Adhesive Nail Forms making it adhere by positioning it under the free edge of the Nail!
CLICK AND DISCOVER PICS NAILS NAIL GEL FORMS !
These particular Single-use Nail Forms, in fact, allow us to create a "base" on which we can apply our Gel in relation to the Length that we want!
Before proceeding with the application of the Builder Gel, we coat a light layer of Primer and we leave it dry in the air for a few seconds, avoiding the contact with any other product or object.
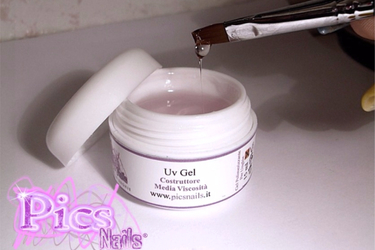
Here we are finally arrived at the Step of Application of our Gel Nails Builder!
The Gel Nails Builder is the main product of our Extension: self-levelling, characterised by the medium viscosity, it will allow us to create our perfect balance point in few steps!
CLICK AND BUY THE BUILDER GEL!
We proceed by applying our Builder Gel with the aid of a Nails Extension Brush of 0.4 millimetres.
In the case of a Nails Extension with Nail Forms, before we will realise the desired lengthening (the so-called Support Gel) and then we will proceed with the creation of our Balance Point!
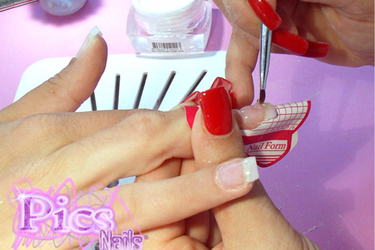
Both in case of use of Tips that Nail Forms, the Step of Application of the Builder Gel and the creation of the Balance point is very important to obtain a perfect finish and a natural appearance!
With small circular movements of the brush, we create a small ball of Gel and we apply it at the centre of the nail: we coat the Builder Gel by imagining to divide the nail in 6 zones!
We start from the centre of the nail surface, then the cuticles area, then we proceed to the external side of the nail, then to the inner side, the Tip of the free corner and, finally, we define the coat work by perfecting the perimeter.
Of course, being a photo-curing product, it will be necessary to use a UV or LED lamp so that the Gel catalyses for about 2 minutes, by drying and perfectly fixing on the Nail!
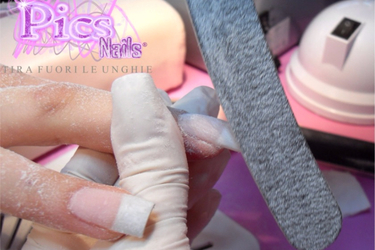
Once concluded the catalysis of Gel, we proceed with the Step of Filling and Definition of our Balance Point, necessary to be able to donate to our nails a really natural and perfect appearance!
In the case of use of Nail Forms, we will remove our Adhesive Nail Forms before proceeding with this new Phase of our work.
We degrease the nail surface with our Nail Cleaner to remove the dispersion layer of the Gel and, using our Curved Nail File Zebra, we work on the Balance Point.
With the aid of a Straight Nail File, instead, we define the nail in three movements, working on the two nail edges and then on length!
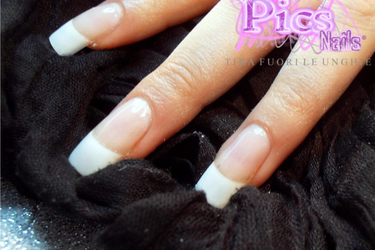
We eliminate every filling remain with a Cleaning Brush...and it is here that our Gel Nails Extension has finally took shape!
Once arrived at this Step of our work we can of course decide whether to proceed with the application of the Sealing Gel Nails or if embellish and customise our work with a Gel Nails Color, or whether to give life to a French or Original and Impact Nails Decorations!
Whatever will be your choice, having followed Step by Step all the correct phases for a Perfect and Professional Extension, it will be fundamental to safeguard a good endurance and a flawless appearance to your work!
In this page we just wanted to summarize the necessary Steps and create a quick summary; in order to deepen and discover all the details and the secrets of a complete and perfect work, we remind you to consult our Section Nails School, Free Gel Nail Tutorials Step By Step and our Nails Videos!
DISCOVER THE NAILS SCHOOL PICS NAILS!
Our Advice, therefore, is always to constantly study and deepen the work methodology of this sector, with Professional Nail Courses and Professional Educational Material....and continue to dedicate yourselves with passion and enthusiasm to your work!
Enjoy your Job Girls!


