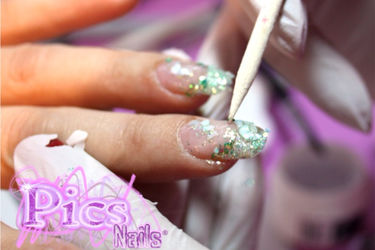
Potremmo definire sinteticamente la Tecnica Sottovetro come una particolare metogologia di Decorazione Ungueale basata sull'utilizzo di singoli Decori (dalle Polveri Glitter alle Scaglie di Madreperla, dagli Specchietti a qualsiasi altro elemento di Decorazione Unghie capace di impreziosire e personalizzare il vostro lavoro) applicati su differenti veli di Gel Costruttore ancora freschi, in modo tale che aderiscano perfettamente, prima ancora della Creazione della Struttura ( Bombatura) ottenuta sempre con il Gel Costruttore!
In questo modo, sarà possibile posizionare sulla superficie ungueale gli elementi decorativi singolarmente, creando sulle vostre unghie fantasie di forma e di colore ogni volta diverse e ottenendo un incredibile effetto tridimensionale!
Ma questa è solo una definizione tecnica...ben diverso è Scoprire Passo Passo quali siano gli Step di Lavoro e i Prodotti Professionali necessari per ottenere un finish perfetto e originale! Ecco perchè abbiamo deciso di approfondire questo argomento nel nostro Blog Unghie, creando uno Step by Step chiaro e sintetico!
(en)
We could synthetically define the Underglass Technique as a particular method of Nail Decoration based on the use of individual Decorations (from the Glitter Powders up to the Crushed Shell Nail, from the Chunky Glitter to any other element of Nail Decoration capable to embellish and customize your work) applied on different layers of fresh Builder Gel, in such a way that perfectly adhere, even before the Creation of the Structure (Bead) always obtained with the Builder Gel!
In this way, it will be possible to place on the surface of the nail the decorative elements individually, creating on your Nails always different patterns of shape and color and obtaining an incredible three-dimensional effect!
But this is only a technical definition... it is very different to Discover Step by Step what are the Working Steps and the Professional Products that are necessary to obtain a perfect and original finish! This is why we decided to deepen this topic in our Nails Blog, creating a clear and synthetic Step by Step!
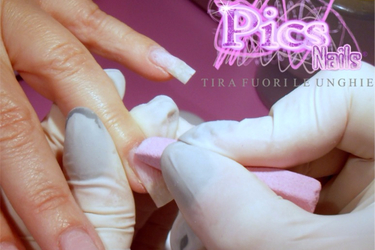
We begin our step-by-step starting from the beginning: also in this case (as in all the Nails Extension works) it will be appropriate to carry out a suitable Preparation Step!
Using our inseparable Stone Nail File for Preparation we will be able to roughen and perfectly matte the natural surface of the nail and gently move the cuticles in excess, by moving them back toward the area of the nail root.
We shall now proceed with small circular movements and work on the entire surface of the nail in a uniform way!
CLICK AND BUY THE STONE NAIL FILE FOR PREPARATION PICS NAILS!
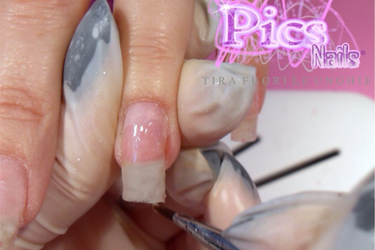
Once you have removed the filings remains with the aid of a Cleaning Brush and a handle of cotton pads soaked in Nail Cleaner, proceed by applying a first Layer of Builder Gel and then leaving it catalyse in our UV or LED Lamp.
This first Layer will "protect" the natural surface of the nail from the colored pigments of the Products that eventually we are going to use, thus avoiding the use of the Decorations in direct contact with the Nail!
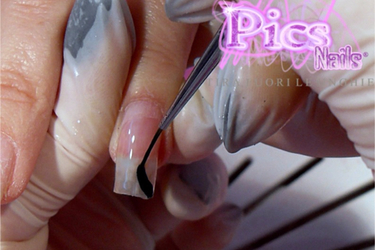
In this case, we decided to Catalyze the First Layer of Gel because we are going to use a Colored Gel Nail Polish - our choice has fallen upon a beautiful Blue - to start our rich Nail Decoration!
We use a Nail Art Brush and draw, therefore, a sinuous vertical line starting from a side of the free edge of the nail and going toward the area of the cuticles, with a decided and light movement....Here we started our Nail Art!
At this point, after the first decoration catalyzed in Lamp, we will proceed by applying a second Layer of Gel...but this time we will let it fresh!
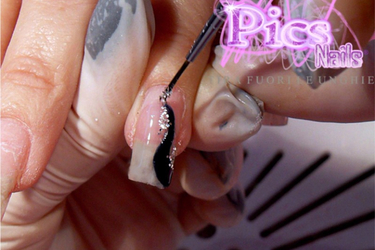
Let’s start our Nail Art with Underglass Technique: we choose the type of Decoration that we prefer and we realise our Decoration placing them on the thin fresh layer of Gel!
In this Step, for example, we applied the Glitter Powder Silver to embellish the outline of the sinuous Blue decoration that we previously made! Once placed the Powder, we catalyzed in Lamp to make perfectly fix the Decoration, before proceeding with the coat of another Layer of Gel!
The wide range of Nails Decorations available in our Shop Online will allow you to give go-ahead to all your creativity, choosing elements always different and giving life to the original and colored combinations, of great visual and aesthetic impact!
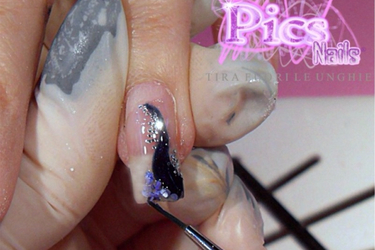
CLICK AND DISCOVER THE NAIL DECORATIONS PICS NAILS!
In this wonderful Nail Art, for example, the use of vivid and contrasting Colors - like the Silver of the Glitter Powder and the Blue of the Crushed Shell Nail placed on a further Layer of fresh Gel - has allowed us to give life to a really peculiar and bright Underglass Nail Art!
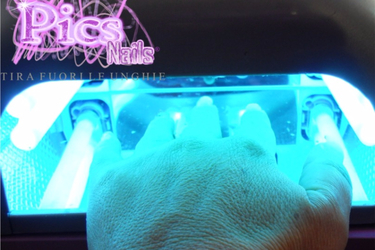
Remember to place the Decorations on different thin layers of fresh Builder Gel and to catalyze after each step: in this way we will get that unique three-dimensional effect that is characteristic of this Decorative Underglass Technique!
We fix therefore what we created so far with the fundamental step in our UV or LED Lamp, before proceeding with our Nail Art...increasingly rich and original!
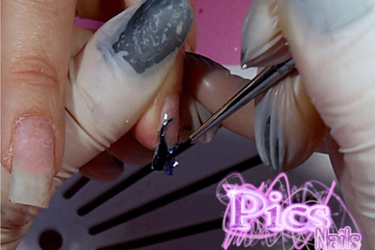
We continue, embellishing more our work: we choose again the Gel Nails Color to draw a second vertical line, making it start from the opposite corner with respect to the previous line...to create a very particular specular effect!
We use once again a Nail Art Brush with a thin tip, which will allow us to work with the maximum precision.
CLICK AND DISCOVER THE NAIL ART BRUSHES!
Concluded this step, we will proceed as always with a passage in Lamp to make fix the new drawing made on the surface of the nail!
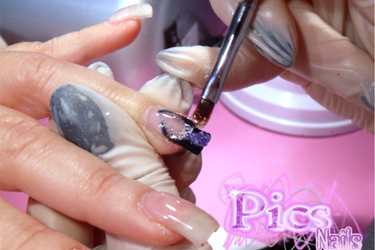
Concluded this step, we will proceed as always with a passage in Lamp to make fix the new drawing made on the surface of the nail!
Once the Nail Art is finished, all that remains is to proceed following the Steps of a normal Professional Gel Nails Extension!
Using once again our precious Builder Gel we realize the Bead, which is fundamental to donate to our Nails a perfect appearance!
We apply the Builder Gel with the aid of a Gel Nail Brush 4 mm. With small circular movements of the brush we create a small ball of Gel and we apply it at the centre of the nail: we coat the Builder Gel imagining to divide the nail in 6 separate areas!
We start from the centre of the surface of the nail, then the area of cuticles, we proceed with the outer side of the nail, then at its inner side, the tip of the free edge and, finally, we define the coat work perfecting the perimeter.
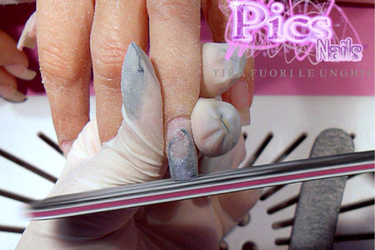
Once catalyzed in Lamp, we eliminate the typical sticky Layer of Dispersion using a square of cotton pads soaked in Nail Cleaner.
At this point, we can further perfect the Gel in excess with a careful Step of Filings: we use the Curved Nail File Zebra Grit to work on the Bead and donate to the nail a really natural aspect, and a Straight Nail File to define the work in three movements, working on the two nail walls and on the length.
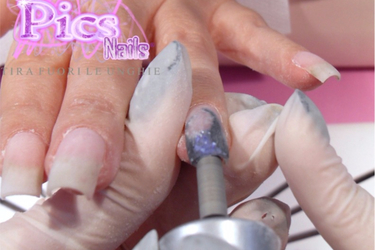
Generally, to obtain a perfect three-dimensional effect, the Underglass technique is carried out in cases of Extension with Transparent Nail Tips, which allow to make even more evident the peculiarity of this type of Nail Art.
But in the case when - just like in this case – the Nail Art has been performed on Natural Nails you can proceed with the aid of a Nail Drill with abrasive cylinder to gently "consume" the natural nail present under the Gel of our Extension: obviously, we recommend this type of procedure only to the most skilled and we remind you that it is sufficient to have a light passage of the Nail Drill, acting with sensitivity on the free edge of the underlying natural nail!
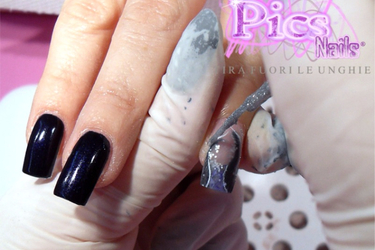
But our Underglass Nail Art does not end here...we proceed by adding further elements to obtain an even richer finish!
Once we removed every residue of filings from the surface of our Extended Nail, this time we use two different Nail Art Polishes - White and Glitter Silver - to decorate the surface of the nail by drawing other two thin vertical lines next to those created before our Bead!
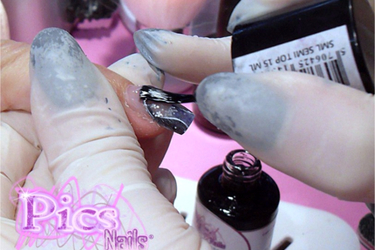
The Nail Art Polish - often also called Decoration Nail Polish - rapidly dries to the air; we therefore wait for a few minutes before proceeding with the final Steps of our work.
We are now arrived to the end of this rich Step By Step: we seal our beautiful Nail Art using our Sealing Gel or a Gel Top Coat as in this case.
It is about, in fact, Professional Nail Supplies able to protect the Work and give it an incredible Gloss!
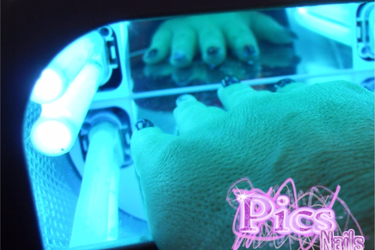
Now all that remains is let our Sealing Gel dry in UV or LED Lamp, to perfectly conclude our creation!
As always, during the step of Catalysis, remember to pay attention to the respect of the necessary laying times (also in relation to the type and to the power of our Lamp), to verify the correct position of the hand in its inside, so that all the fingers are well exposed to the Led or UV Light, and last but not least to periodically check the condition of the Bulbs of our Lamp, and replacing them if necessary.
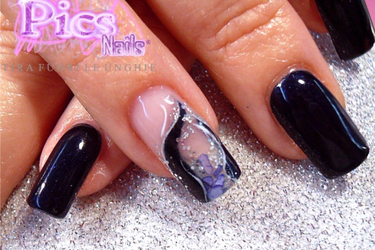
Here we arrived at the conclusion of this charming Step By Step Nail Art with Underglass Technique...an extremely rich, professional and original result!
In the case of this Nail Art, we decided to work only on annular fingers of both hands, to donate the Work a slight, elegant and particular finish , but the possibilities are really endless!
All that remains is to wish you good work and recommend you, as always, to constantly practice and update yourselves, to create even more original and current Nail Art! Good Work Girls!


