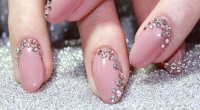
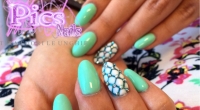
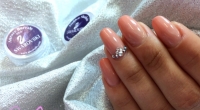
Quilted Nails or Quilt Effect Nails: do you already know this incredible new Nail Art Trend?
This is a Technique which is very particular that allows to obtain a finish characterised by the very chic "quilted" aspect, especially if embellished - as we will see in the step-by-step below - by the Light of the Swarovski Nails!
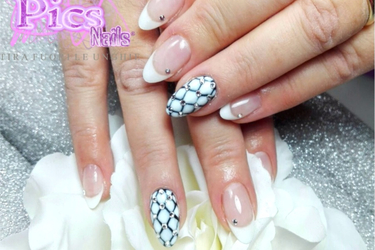
Having regarded to the great success of this Nail Trend and the many requests received in these months in our Social Channels and in our Nail Salons, we decided to dedicate a new deepening of our Nail Art Blog precisely to Quilted Nails!
We thought it could be useful to explain step by step the work methodology to be followed and make you discover Professional Nail Products Pics Nails required to obtain a really flawless Finish!
Enjoy your Reading Girls!
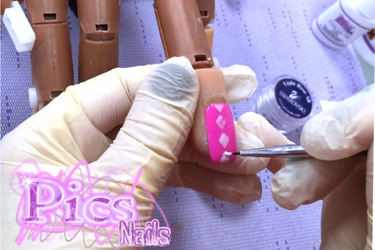
Before starting our Step-by-Step, it is good to remember that we can realise our Nail Art both on a Gel Base that Gel Nail Polish Base: our advice is, whatever your choice, to seal the Colour, Degrease the Nail surface after the phase in the lamp and buff it before starting your work.
The dispersion layer which would occur if we do not follow this Step, in fact, could create some problems in the creation of Rhombus for our Nail Art, making "slide" the Colour and thus compromising the precision of our work.
We begin our work by realising on the nail surface small Rhombus, with the aid of a Brush with thin tip.
In this case, we have chosen a Uv Gel French Extra White, which is perfect to give life to a Quilt Effect of great impact on any base colour!
CLICK AND BUY THE UV GEL FRENCH EXTRA WHITE!
We design our small rhombus trying to leave a space between each other: the use of a Nail Art Brush Precision is therefore fundamental, because its threadlike tip will allow us to be precise and work on the details!
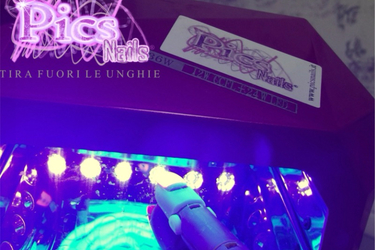
Once made a first row of rhombus, we proceed immediately with their Catalysis in Lamp!
It is good to space out steps of drawing and catalysis to avoid that the Gel Nails "trickles" and that the Rhombus enlarge on the nail surface.
Catalysing from time to time, instead, we will be able to keep intact the size of our Rhombus and to obtain a more precise work!
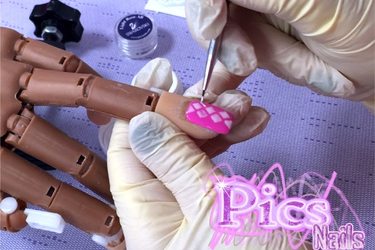
We continue in the realisation of our small rhombus, that will give life to the particular desired Quilt Effect!
Always with the help of our Nail Art Brush, we continue to draw our White Diamonds, distancing them from each other in such a way that we can see the underlying Colour.
CLICK AND BUY THE NAIL ART BRUSHES PICS NAILS!
Once drawn another row, always remember to Catalyse in Lamp our Work in such a way as to perfectly fix the Rhombus on the nail surface and ensure that keep a correct size.
We proceed in this way until we have covered the entire nail surface and we catalyse!
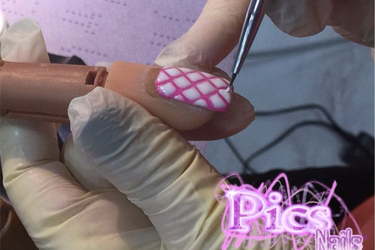
Having reached this point of our Work, it will be important to retouch again every single designed Diamond to give more volume and create a thickness that gives to our Nails exactly the Quilted Aspect!
With our Nail Art Brush we apply again the Uv Gel French Extra White on each Rhombus, following the sizes and the "draft" of what we have already done!
We catalyse once again our work done so far and we prepare ourselves to the next Steps...our Quilted Nails finally take shape!
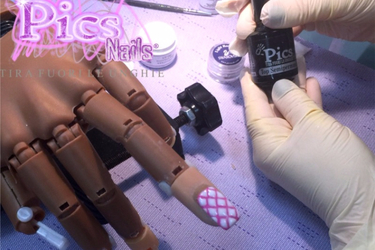
Once completed the realisation of Diamonds on the entire nail surface, we obviously need to Seal our Work!
We recommend you to use a Gel Top Coat, which is perfect in cases in which it is then necessary to use a Nail Glue, as we will see in the following Steps.
We apply our Top Coat of the Gel Nail Polish Line and let it dry by catalysing in Lamp.
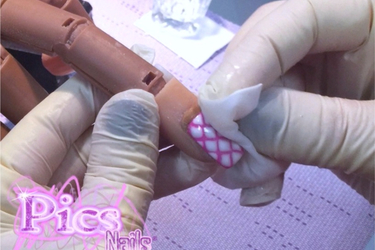
As in any work, remember to well seal the nail surface and "roll up" the free corner of the Nail in such a way as to close and protect to perfection as created so far!
Once the stage of catalysis is concluded, we proceed by eliminating the dispersion layer (that is the sticky layer that is created as a result of the exothermic reactions activated during the polymerization of the Product inside the Lamp).
We use as always a square of cotton pads - we recommend the pressed one to avoid leaving lints or residued on the nail surface - soaked with Nail Cleaner.
_ti14475_en.jpg)
Here we are ready for the last Steps of Work for the realisation of our Quilt Nail Art!
We prepare in our workbench everything you will need for the application of the Swarovski Nails! To give even more Light and Sophistication to our work, in fact, we are going to embellish the Nail Art with Glitter characterised by the unmistakable brightness.
Here is everything you need for a perfect result: the Nail Glue, a Wooden Cuticle Pusher and obviously the Swarovski Nails! We choose the Colour for our Rhinestones that we most prefer and that are more suitable to the colours chosen for our Nail Art...in our Pics Nails Catalog there are so many to choose!
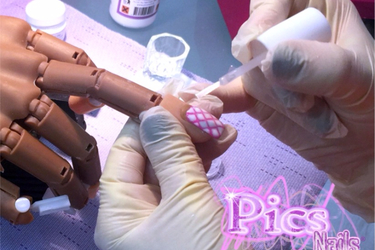
We now proceed with the Application of the Nail Glue!
We use this specific Glue for the Application of our Rhinestones: it is in fact an indispensable Product in the Nail Technician field and suitable in cases of Applications of Decorations, Nail Stickers, Tips, Nail Art Strass...and for our Swarovski Nails!
It will be sufficient a minimum quantity of product to ensure the maximum cohesion to our Decorations: we use the integrated Brush in the bottle and we apply our Nail Glue in the areas in which we are going to place the Rhinestones!
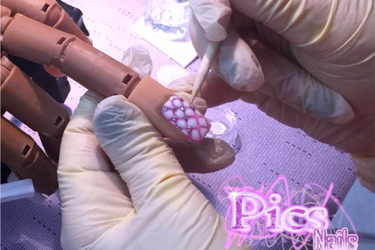
Finally we apply our Swarovski Nails!
With the aid of a Rhinestone Picker or with a simple Wooden Cuticle Pusher we now put the Glitter in the points of intersection of the Diamonds, thus creating, in a more evident manner, our beautiful Quilted Effect!
The Rhinestones, places at the corners of the Diamonds, give an optical effect of depth to our work and, of course, a particular brightness to our Nail Art!
At this point, we will not have to do anything else that let the Glue dry to air for a few seconds, which will adhere perfectly our Swarovski Nails ensuring an incredibly durable hold!
...and we reached the conclusion of our Quilted Nail Art!
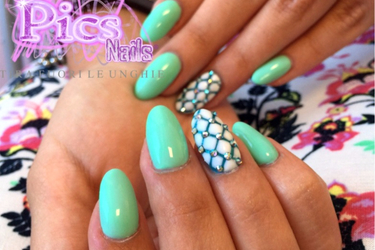
An elegant, brilliant, original and of the sure visual impact finish,...for Nails characterised by the Quilt Effect in line with the most current trends of the Sector!
Obviously, in this new deepening of our Blog we have been able to show You only one useful example, using the Practice Hand to show You step by step each stage of work and choosing a Fuchsia Base.
Our advice is to have fun and to 'play' with different colours, giving life to the contrasts of colour of great impact and always different, as in the image shown here next!
Good Work Girls!


