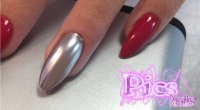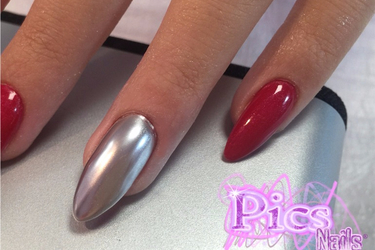
The Chrome Nail Powder is a great News signed Pics Nails: a special Glitter Powder capable to give your Nail Art a very particular Chrome Effect, thus obtaining a delicate Chromed and Covering Mirror Effect!
It could not lack, then, a New Step by Step Tutorial dedicated to the correct Methodology for the Application of the Powder: as you will see in this new deepening of our Nails Blog, we will show a Step by Step Tutorial of the Powder applied on the Uv-Led Sealing Gel Pics Nails (Sealing Gel without Dispersion Layer).
We repeatedly said, in fact, that our Council to obtain an optimal result is to use the Chrome Nail Powder on a product devoid of Dispersion, exactly as our Led Sealing Gel.
All our Step-by-Step Tutorials, moreover, refer to a work that is carried out with the use of Nail Supplies branded Pics Nails: if you use products of other companies, we recommend you to follow our advices and possibly test other options of use if you are not completely satisfied with the result obtained.
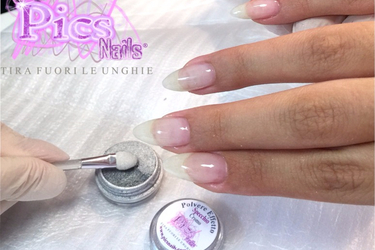
Let’s begin our Step-by-Step: in this new work, we are going to use the New Chrome Powder Mirror Effect only after having sealed the Nail with the Uv-Led Sealing Gel Pics Nails.
This particular Sealing Gel, in fact, leaves no dispersion layer after its Catalysis phase in Lamp, but creates the perfect condition on the surface of the Nail for the Application of our Powder!
If you use, instead, the Powder in a work with Gel Nail Polish or One Step Gel Polish 3in1, we suggest you to follow the instructions that are present in the detailed Product Fiche of the Powder.
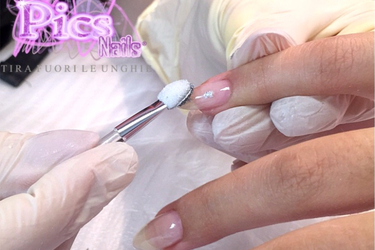
We apply a small amount of Powder with the aid of the Brush (that we offer You with the purchase of our Chrome Nail Powder Pics Nails).
We Pick up the Powder directly with the Brush and we Tap it on the Surface of the Nail.
A small amount of Product will be necessary to achieve a good work, but you will realise - during the application - whether it is sufficient or if it is necessary to use more.
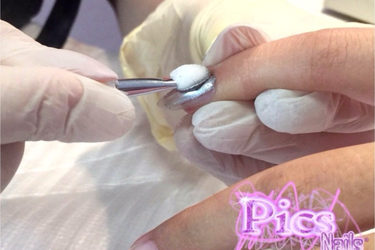
We begin to "spread " our Powder proceeding with gentle Circular and Vertical movements.
We apply the Powder until we will perfectly and uniformly cover the whole Nail Surface.
If it is necessary, we get another small amount of product, always with the help of our Brush.
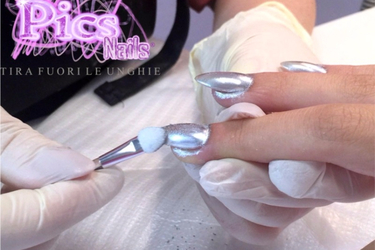
We proceed in this way until we will be satisfied with the uniformity and opacity of the Product: the entire Nail Surface must be Chromed in an uniform and perfect way!
The surface of the Brush, characterised by a spongy surface, allows us to work with precision and apply best our Powder.
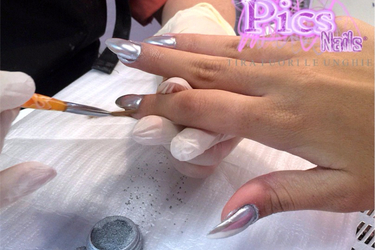
We conclude our Nail Art Mirror Chrome Effect!
Also in this case, do not worry if a bit of Powder has gone on the fingertip or on the area of the cuticles...it is very common, but it is important to obtain a perfect and clean finish.
Let’s go proceed then removing any residue of Powder in excess, simply with the aid of a Cleaning Brush and by "dusting" the areas that accidentally got dirty during the realisation of our Nail Art.
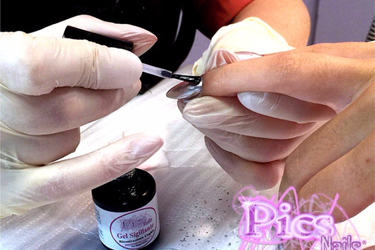
Here we are arrived at the final Step of our Work!
All that remains is to close and protect the Nail Art realised, going to Seal our Nails with the Led Sealing Gel.
We apply the Sealing Gel always remembering to pay some little attention: we avoid touching the Cuticles and we remember to tuck the Free Corner of the Nail to perfectly "close" our Nail Art Mirror Chrome Effect!
At this point, we proceed by Catalysing the Sealing Gel into the Lamp for 120 seconds (it will not be necessary to degrease the surface of the nail in the case of the Led Sealing Gel).
Also this time, all we can do is to wish you Good Work and give you a small advice: have fun to experiment and, following our basic indications, test the use of Powder on your Nail Supplies, with the goal of increasing more and more your skills and always get a professional, lasting and impeccable work!


